omg dont be ashamed at all!! Hands are generally tough to get used to, lots of artists struggle with it! so dont be ashamed i feel you.
and I actually have made a hand anatomy guide before in fact! If you want to get better at drawing hands I def recommend you learn the basic anatomy first. Please check out the ones I made, I try to make it simple and easy to understand:
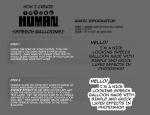
There’s my guide to the anatomy, but here’s some more tips that I’ve noted to myself that I’d like to include
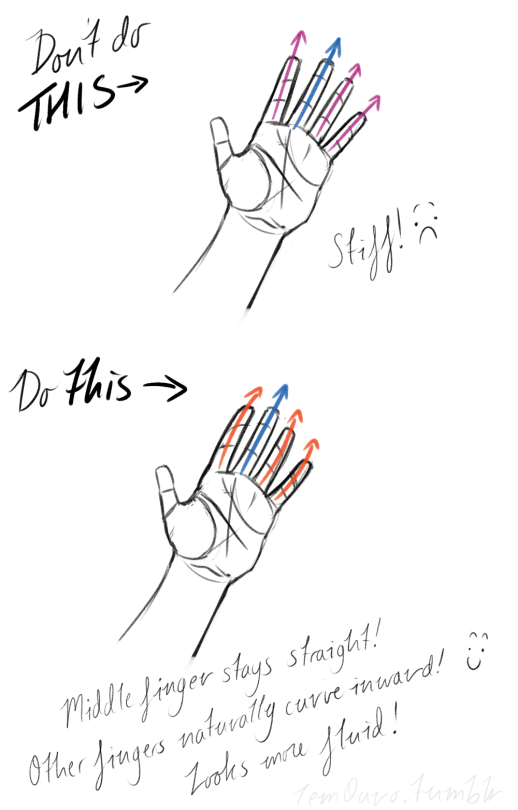
First off, I’d like to just note on the fingers: if you pay close attention to your own hand, you may notice the fingers are ever ever so slightly curved inward. It’s a very subtle detail, but I noticed that, despite how slight it is, it can make a hand look more lively, and less stiff.
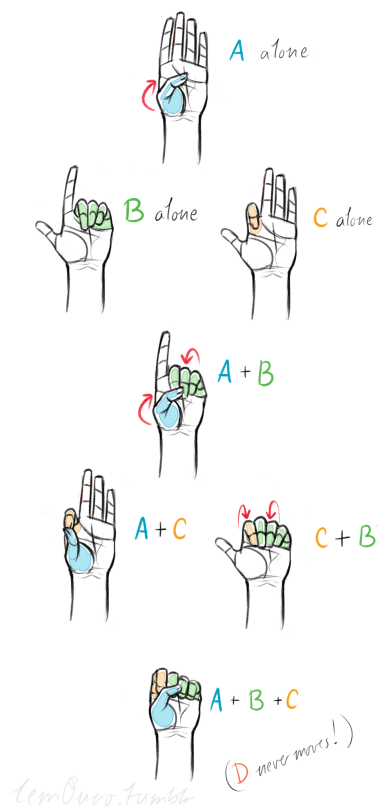
Second, the “M” on the palm! Your hand moves in many ways, and because it does it creates creases in your hand. The most prominent creases appear to make an M shape; this is handy to remember for what I’m going to talk about next. (It also could be a “W” I guess, or to be more specific a “ )X( “; just think of it in whatever way helps you remember!)
SO now that you see the M, draw your hand as a basic blocked shape and add your details. As you do, you can see that the M divides the palm into four basic parts!
When the hand moves, parts A, B, or C of the palm, alone or in different combos, will create the general poses that the hands do normally. These parts are the parts that move, with D being stationary, no matter what!
Here’s a chart of all the possible combos. Once you have down what part of the hand moves for a certain pose, you can change up the fingers and tweak it a bit to do what you need to make it more specific!
This is simply my method of drawing hands. God knows there are hundreds of tutorials out there by other artists, but personally, this way helps me the best (after learning the anatomy first).
This way I can divide the hand and combine the parts in any such way I need!
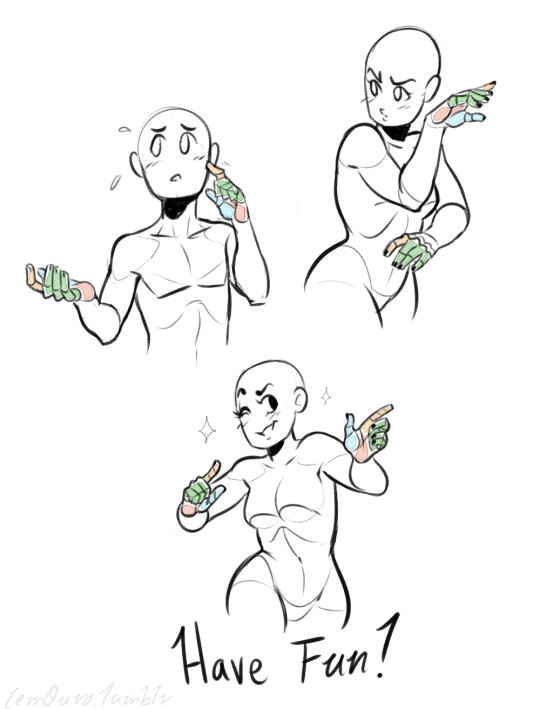
Hands take a lot of effort to grapple, and you need to practice them a lot, especially foreshortening of the hand; that’s really something you need to learn through your own studies. Look at your own hands, draw hands from life, from magazines, shows, comics; just draw hands! You’ll eventually figure out a method that works best for you. So to get better at drawing hands; draw hands!! And don’t stress over it, have fun with it!
UHH tbh the way I color hair is very inconsistent.. I change it a lot but I kinda explained it here and also here’s a short step by step, hope that helps!
-they got six free things free for you to download every week, so imagine just how much resources you’ll have after a year. their marketplace is also full of great and affordable design resources. and their blog is pretty awesome too.
– i actually got the paper crane pattern as a free download from their site, because they have a lot of freebies, and they have huge discounts too for items in their design bundles
color heaven. not only are there all these gorgeous color palettes, but there are also these beautiful photographs accompanying each one, because that’s where each palette came from. it is absolutely gorgeous, i tell you.
this is such a no-brainer. you can just spend all day surrounded by visual inspiration on this site. if you love type and hand-lettering, you can check out my boards.
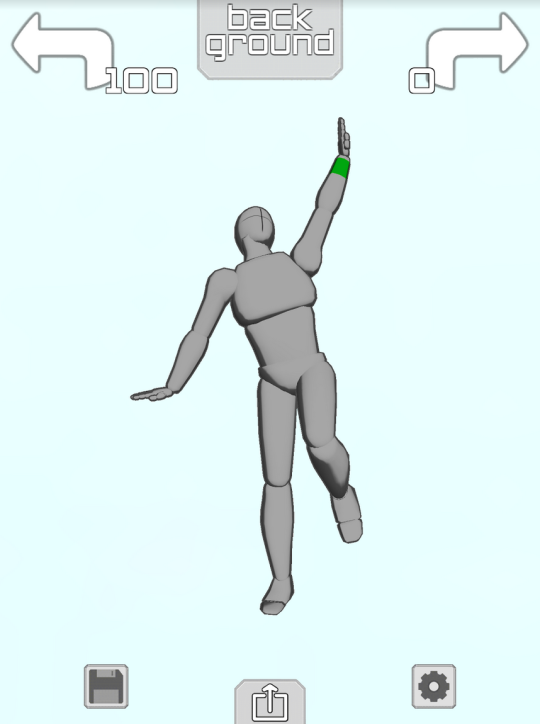
if you have an ipod or iphone or ipad or whatever then Please download the app “Make a Pose”
it gives you a lil figure like this
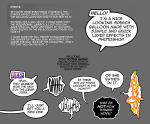
and you can make them do whatever you want!! Like
Took me about 1.4 minutes to make this sad little guy it’s Really easy to get the hang of
they Happy
you can change the camera angle so easy too so you can get perspective + foreshortening reference
THIS IS ALL FREE TOO but if you pay $2 you unlock the ability to have two figures onscreen at the same time so you can make COUPLE POSES
AND YOU CAN CHANGE THE LIGHTING,
you can also make rooms and place some objects or characters like so:
YOU WANT A CHARACTER W/ A BIGGER CHEST? HERE THEY ARE
YOU WANT A FRICKIN HORSE?
NEIGH NEIGH MOTHER FUCKER
ANYWAY YOU CAN PAY ABSOLUTELY $0 TO GET THE APP WITH THE ABILITY TO POSE ONE FIGURE AT A TIME AND IF YOU PAY $2 YOU GET TO PUT UP TO 6 CHARACTERS ON THE SCREEN AT ONCE AND YOU ALSO GET A GOTDAMN HORSE. again it is called “Make a Pose” and it’s for iphone or ipod touch or ipad and i cannot recommend it enough
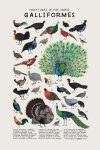
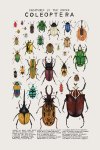
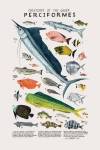
Illustrator Kelsey Oseidfocuses on drawing the animal kingdom, each of her sublime creations depicting majestic various creatures.
The Minneapolis, Minnesota-based artist mainly works with gouache and watercolor, relying on its light washes and soft hues in a youthful play of light and shade. There is a vintage look in all her folklore and nature inspired creations. Her illustrations resonate her love for Mother Nature, particularly the members of the animal kingdom that she illustrates with such dexterity. Buy her original art prints in her Etsy shop.
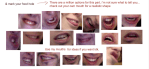
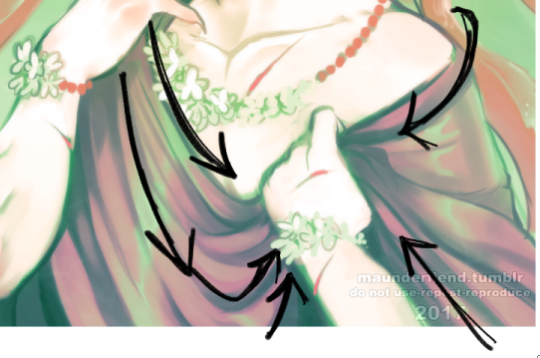
Aaah thank you! Well, first things first; learn from reference! You can google fabric reference or even just outfits and pay attention to the way the fabric swoops and curls around the form that its surrounding.
Here the fabric sweeps downwards, but comes up at a much tighter, sharper angle into his hand and bunches up within his palm. The material layers overtop of each other
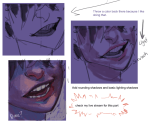
This fabric is very loose and shimmery, and within the overlapping folds your shadows will be most prevalent to give it dimension of being layered.
Even with skin tight fabric there will always be creased, wrinkles, and layers where the material is pushed together. It is important to capture that! Whether the fabric is tight, or very loose. The tighter, the less wrinkle typically if it is pulled taught, while looser fabric will have more swooping lines of flow and tend to be thickly “banded” with spread out areas.
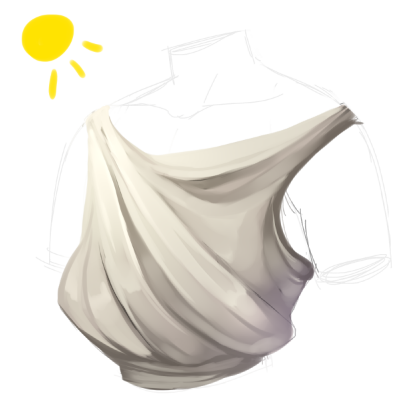
here is our mannequin torso for the purpose of visualization of the render process!
I start with the basic shape of what I want my clothes to be, and then i go from there to decide which way my fabric will be sweeping
now I block in colors, I always use a middle tone of the shade i want instead of the pure shade that I’m aiming for. The shade I’m aiming for I will use as a highlight to be where my lightsource is casting
I typically merge down at this point as I prefer to paint on one layer, and i start to blend and loosely figure out the way i’m going to further express the drape of my fabric
I refine and increase my brightness and darkness according to what i feel is needed to achieve my chosen contrast
refine, blend, and adjust as you need and to your personal preference!


You must be logged in to post a comment.