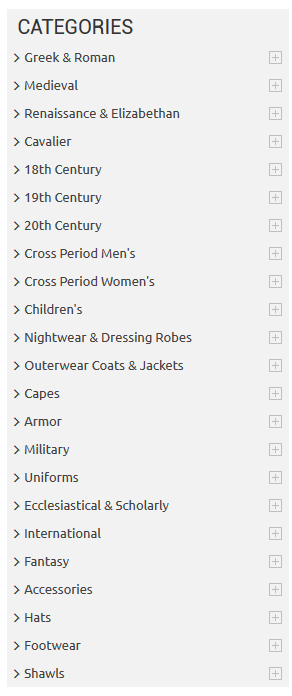
Do you design a lot of characters living in not-modern eras and you’re tired of combing through google for the perfect outfit references? Well I got good news for you kiddo, this website has you covered! Originally @modmad made a post about it, but her link stopped working and I managed to fix it, so here’s a new post. Basically, this is a costume rental website for plays and stage shows and what not, they have outfits for several different decades from medieval to the 1980s. LOOK AT THIS SELECTION:
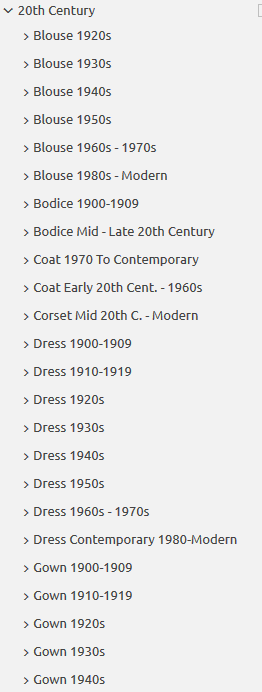
OPEN ANY CATEGORY AND OH LORDY–
There’s a lot of really specific stuff in here, I design a lot of 1930s characters for my ask blog and with more chapters on the way for the game it belongs to I’m gonna be designing more, and this website is going to be an invaluable reference. I hope this can be useful to my other fellow artists as well! 🙂
hello i am here today to not lose track of the art cheats i have discovered over the years. what i call art cheat is actually a cool filter/coloring style/way to shade/etc. that singlehandedly makes art like 20 times better
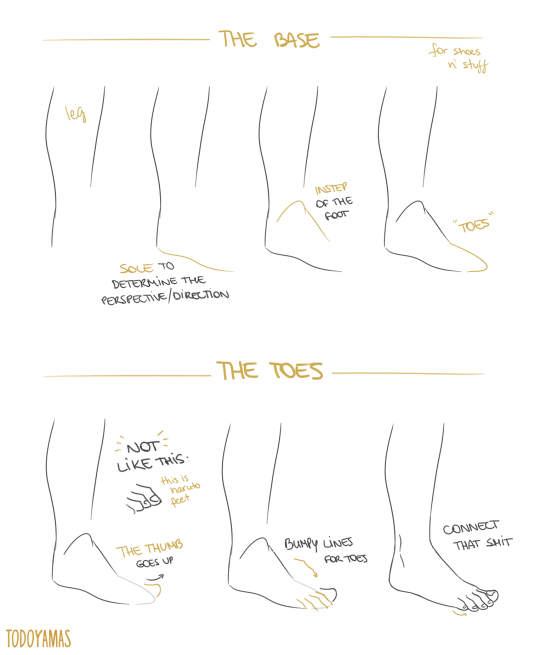
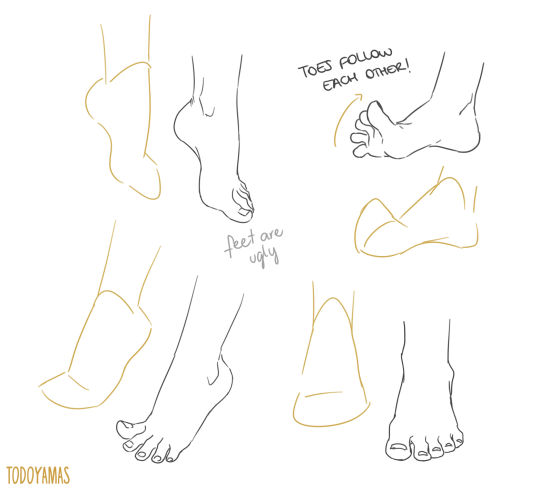
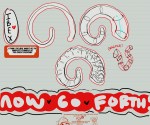
thank you a lot anon!! ( /)w() here, i made a few notes about the steps i follow while drawing feet:
^ that’s assuming you’re not drawing from a low perspective, as if the camera was on the floor or something like that!
SORRY MY HANDWRITING SUCKS and i’m not really good at explaining things bc i don’t really follow a guide and stuff so yeah BUT I HOPE IT WAS HELPFUL TO YOU!!
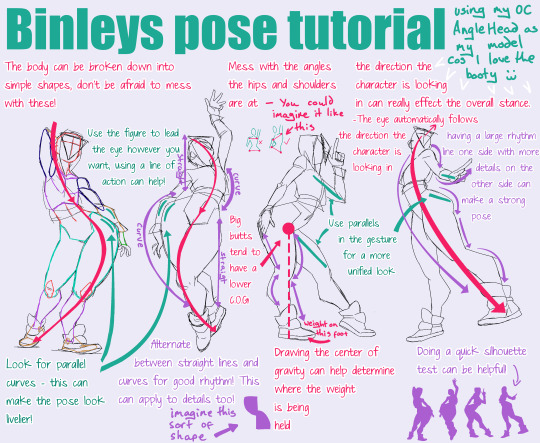
Here you go buddy!!! I mean this is by no means a how-to, more just random tips that may be helpful to apply to your style! Also please bear in mind I massively over exaggerate butts and thighs and this may not be something you are into lmao
OKAY SO! @biazerod asked me a little help on storyboarding and i decided to make this tutorial…i’m not a professionist. so don’t take these as golden rules…just advices! and as always sorry for the english
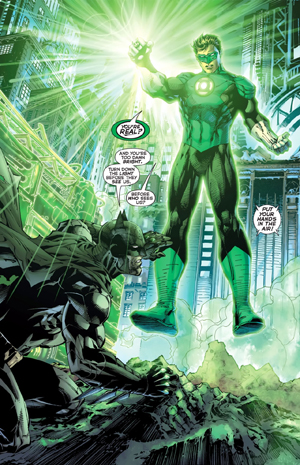
FIRST THING FIRST! the storyboard part is the most important phase in a comic page ! you can spend an entire day storyboarding! because it’s the structure, the essence of the page! here’s some tips : 1- a page can start from 1 panel/frame (called splash page!) until how many f*cking panels you can fit ! (some pages , especially in french comics/bd can reach 24 panels/frames!) Exaple of splash pages:
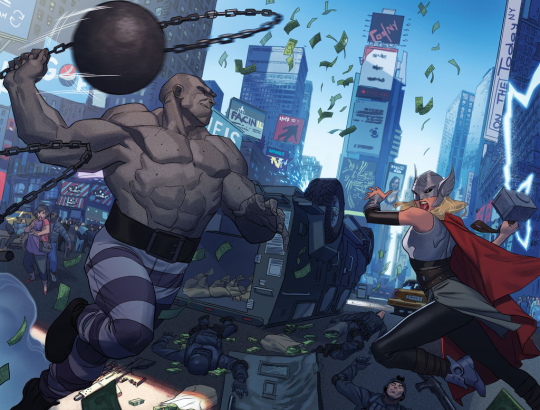
(these are from the green lantern,DC and the newest Thor ,marvel ) Splash pages are a priority of American comics, you rarely can find them in french Bd ! they represent a scene of impact! a fight! a revelation! be careful! use it only one if two times on a range of 50 pages! cuz it cut the narration! instead in french bd you find this :
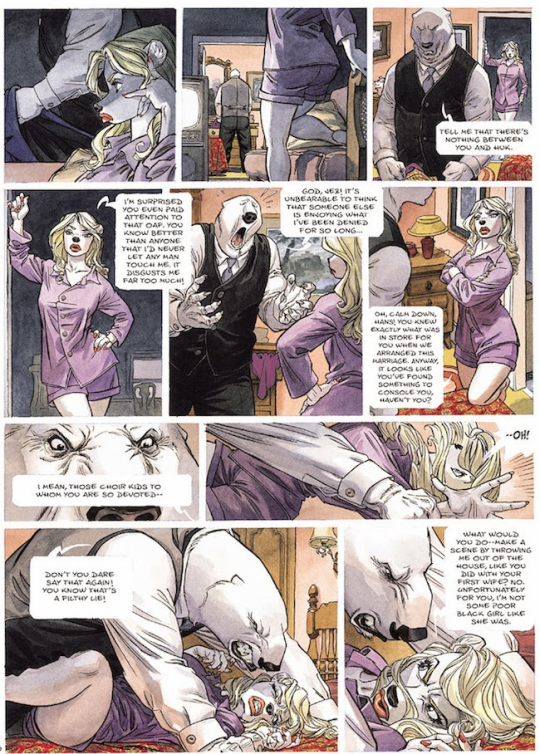
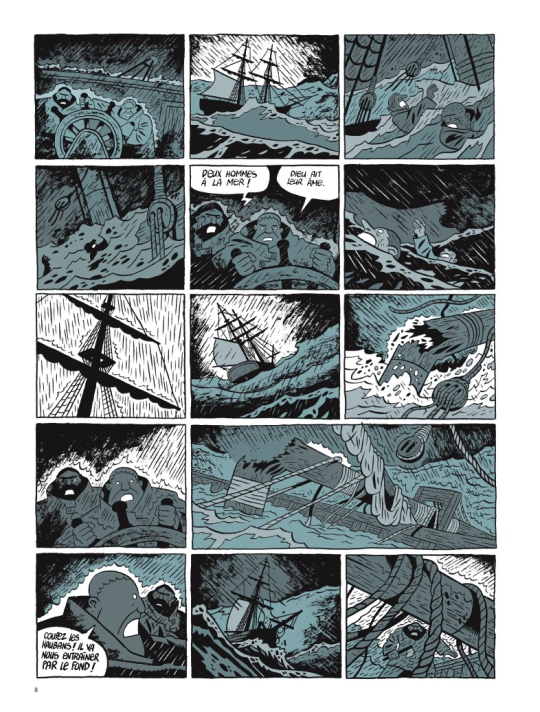
first one is from Blacksad 2# and second one is from Atar Gull see how high the number of the frames is??
the number of frames is very important in a page because it decide the narration time! 😀 also it all depends on the kind of ‘’direction’’ you want to use on your comic! so be really careful when you decide the number of the frame! LET’S PASS ON THE CREATION!
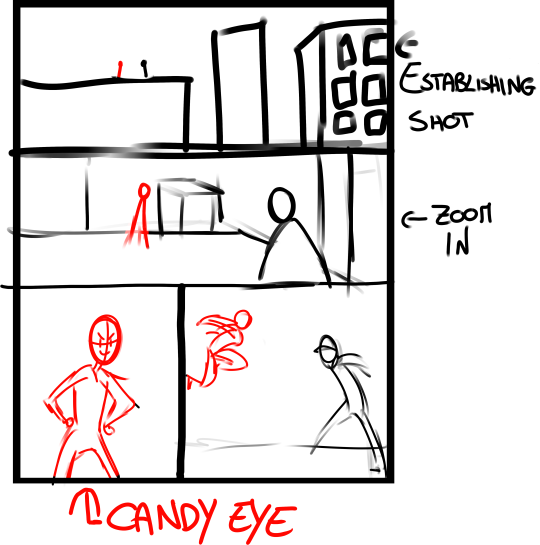
1- when you have a page that contains more than 3 Frames ALWAYS. ALWAYS HAVE AN ESTABLISHING SHOT!
the establishing shot is fundamental! BECAUSE READERS CAN UNDERSTAND WHERE THE CHARACTERS ARE!
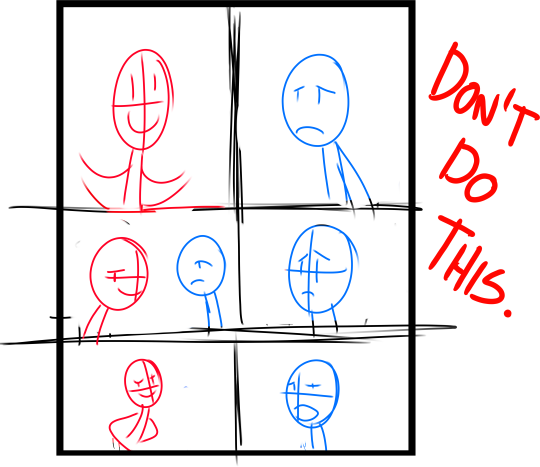
DON’T DO A COMIC PAGE FULL OF FACES !
DON’T DO THIS! LET THE CHARACTER BREATH! LET THE READER BREATH! PLAY WITH YOUR CAMERA! YOU HAVE THE POWER! in a comic page, is important to put the camera far away from the character most of the time! play with the different shots!
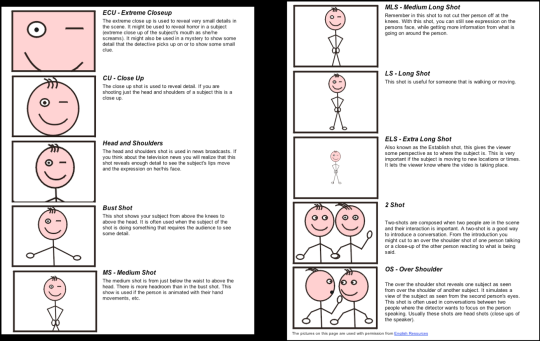
(found this on google) WATCH MOVIES AND TV SHOWS. lot of them can help you so much you have no idea! a comic artist and a director do the same job when creating a story
2- Candy eye this is a tricky trick that can help you with the audience! when a character is saying something important or you have to introduce them , USE THE CANDY EYE DUDE.
the candy eye is , basically, a bust shot where you show the character,their features , usually with a cool or a funny expression ( or of course it depends from the situation) and believe me WORKS 10/10 with the audience 😉
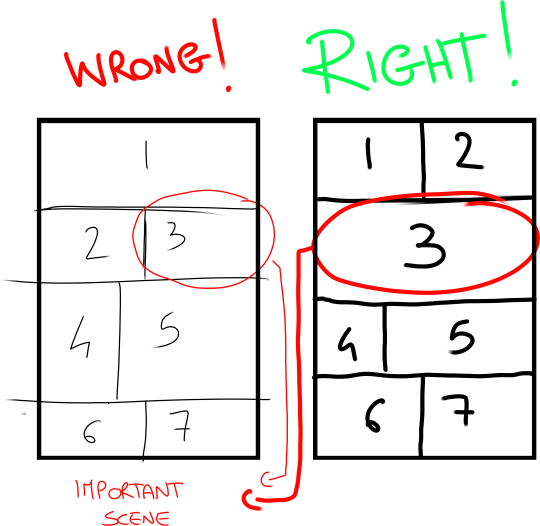
3- HIGHLIGHTS THE IMPORTANT SCENE IN THE PAGE!
FINAL TIPS: – when you’re doing dinamic poses try and try again! the first one isn’t always the best! -USE REFERENCES. –A STORYBOARD PAGE CAN REQUIRE EVEN 4 HRS IF NOT AN ENTIRE DAY IF NOT AN ENTIRE WEEK. REMEMBER THAT THE STORYBOARD IS THE ESSENCE. AND THE REST IS DECORATION. – IMAGINE THE SEQUENCE! NOT THE SINGLE PAGES. THINK IN SEQUENCES! imagine what would happen after the page you are creating! connect the various pages NOT THE SINGLES FRAMES ! YOU’RE CREATING A STORY! NOT A SINGLE ILLUSTRATION! -AGAIN DON’T DO PAGE OF FACES. most important thing:
if the page you’re creating it stresses you! STOP. continue it when you are in a better mood ,dude. our job requires lot of time and effort, but it should be the job we love. so don’t stress yourself and keep calm.
hope this is useful. don’t take this as golden rules, this is just the way i work 🙂
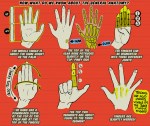
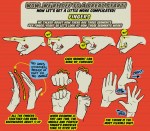
It’s Meg with another TUTOR TUESDAY!, I’ve finally bit the bullet and tried out a hand tutorial! Hopefully there’s something new that will help you along with hands! If you have any tutorial recommendations for next week, lemme know! As always, keep practicing, have fun, and I’ll see you next week!
Im pretty shit at explaining things so i’ll use this for basic example. Firstly if you know how shadows work and stuff then it shouldnt be to hard. Otherwise go study that shit.
So you got your flat colors down for the first step
Next lay down a dark tone set to multiply, idk about 70% i guess? up to you
Start adding some shadows set on another multiply, shadows can be however dark. 50-70%
The add your light source, i used color dodge in this one. Dont use super bright color or it will look like blinding light. (again if you know light/shadows shouldnt be to hard)
I add a touch more dark in the shadows for effect…or something like that.
And there you have it, this maybe helpful lesson was brought to you by a potato, chur.
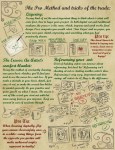
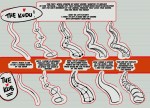
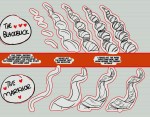
A really late TUTOR TUESDAY on antlers which ARE NOT horns, so ya’ll can stop razzin’ me about not putting them on last weeks tutorial! If you have any tutorial recs send ‘em in here or my personal! Keep practicing, have fun, and I’ll see you next week!
It’s Meg for this week’s TUTOR TUESDAY! Today we take a little look at hopefully some exercises that will help with drawing horns! So go draw some peeps with horns, my dudes. If you have any recs send ‘em in here or my personal. Keep practicing, have fun, and I’ll see you next week!


You must be logged in to post a comment.